Project 13: Web Banner/Header
Instructions:
Step 1
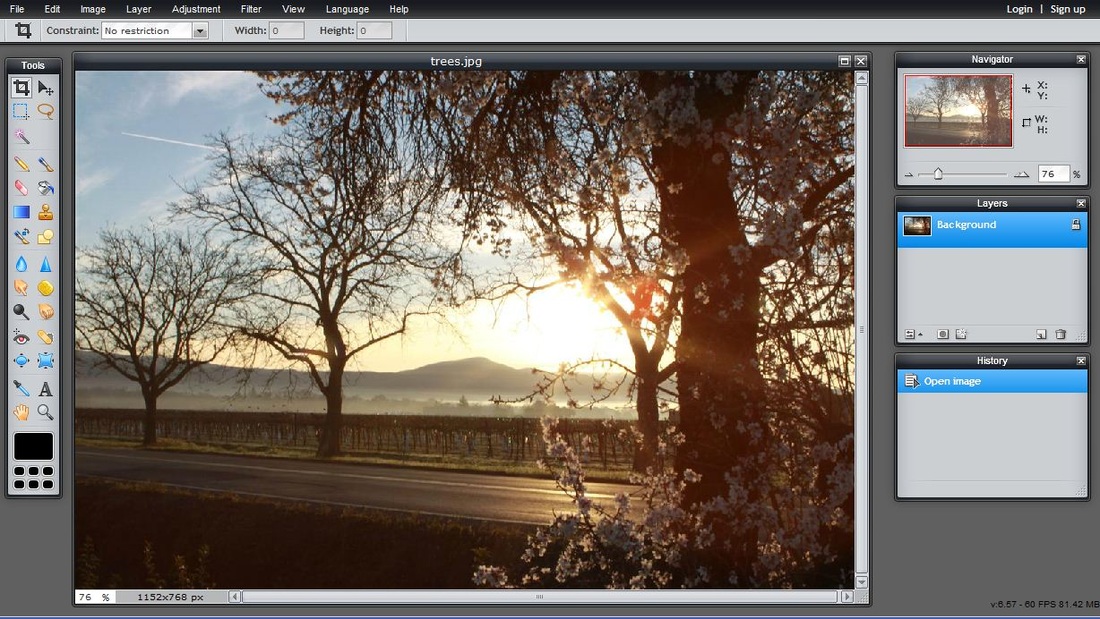
Download trees.jpg and save it to your computer. Then open that image in Pixlr.com.
Step 1
Download trees.jpg and save it to your computer. Then open that image in Pixlr.com.
Step 2
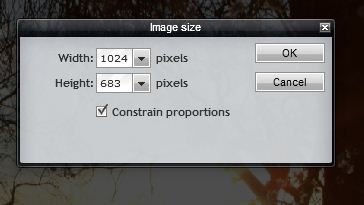
Go to Image, Image size and change your pixel size to Width1024px.
Go to Image, Image size and change your pixel size to Width1024px.
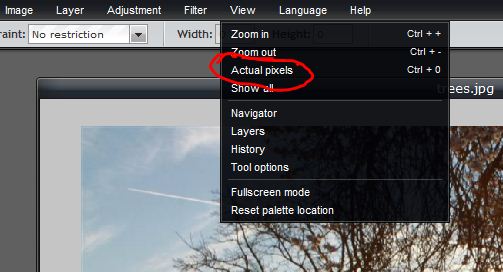
Select View, Actual pixels to see the actual size of the image. You can zoom out if you are zoomed in too much.
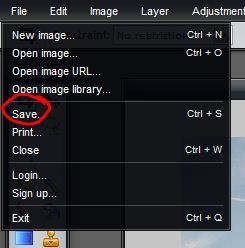
Save.
Step 3
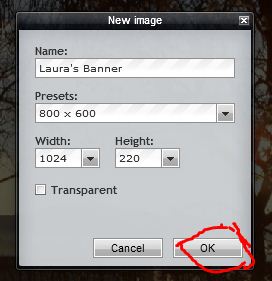
Open a new Pixlr document. Width 1024px, Height 220px.
Open a new Pixlr document. Width 1024px, Height 220px.
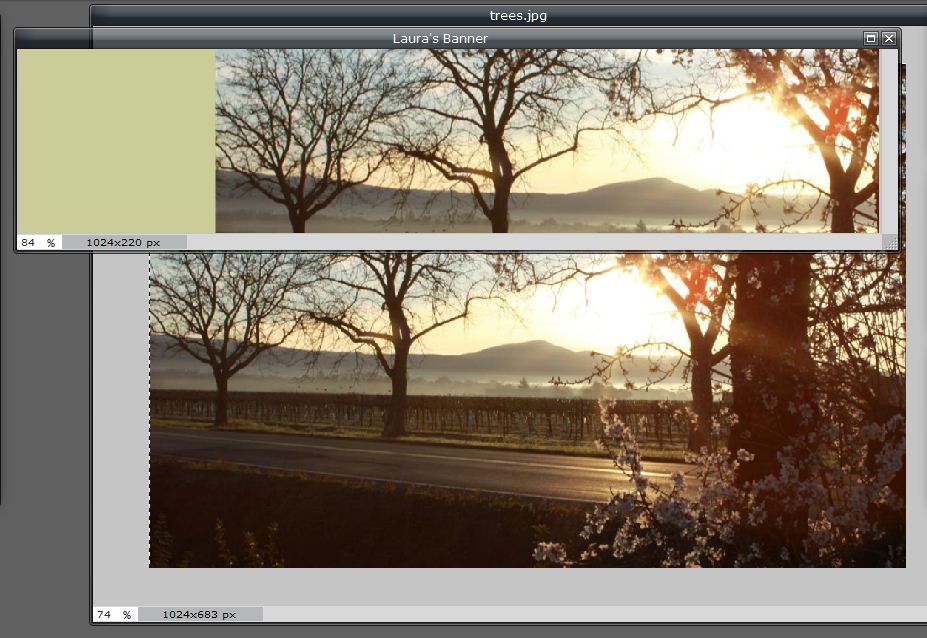
Using the eyedropper tool in Pixlr or another method of selecting a color palette mentioned earlier, select a color from tree.jpg. I chose #cccc99 , a comforting green shade.

Using the paint bucket tool, color your banner.

Step 4
Go to "trees.jpg" and press CTRL + A to select all, then press CTRL + C to copy. Then go to "Your Banner" and press CTRL + V to paste. Move around the image so it looks like the screenshot below and leave some of the green off to the left side.
Go to "trees.jpg" and press CTRL + A to select all, then press CTRL + C to copy. Then go to "Your Banner" and press CTRL + V to paste. Move around the image so it looks like the screenshot below and leave some of the green off to the left side.
Step 5
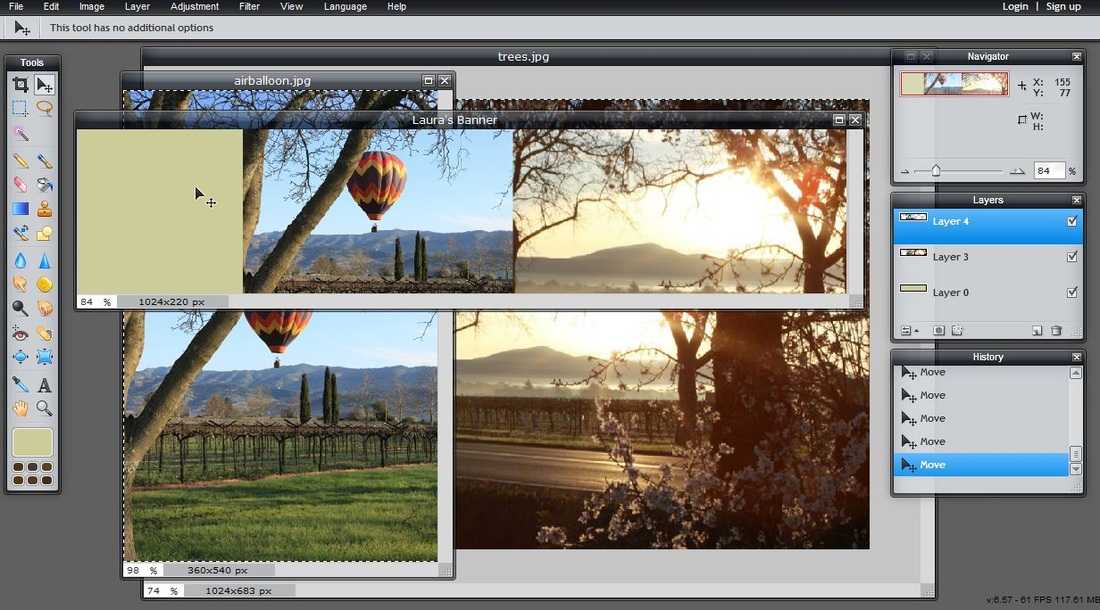
Download airballoon.jpg and save it to your computer. Open the image in Pixlr. Press CTRL + A to select all of "airballooon.jpg", then press CTRL + C to copy. . Then go to "Your Banner" and press CTRL + V to paste. Move around the image until it looks like the screenshot below
Download airballoon.jpg and save it to your computer. Open the image in Pixlr. Press CTRL + A to select all of "airballooon.jpg", then press CTRL + C to copy. . Then go to "Your Banner" and press CTRL + V to paste. Move around the image until it looks like the screenshot below
Step 6
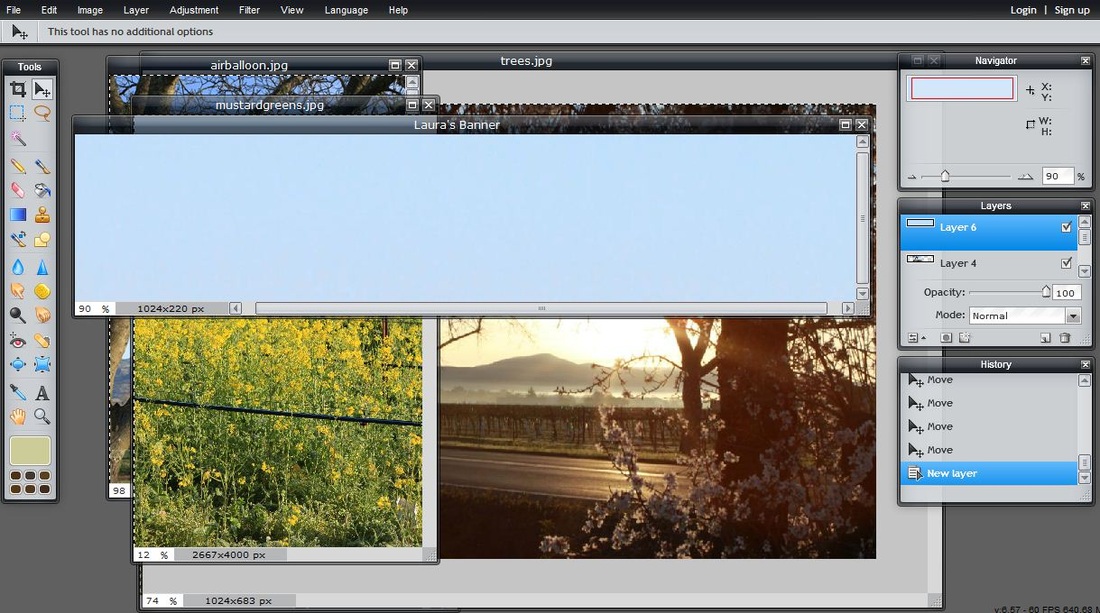
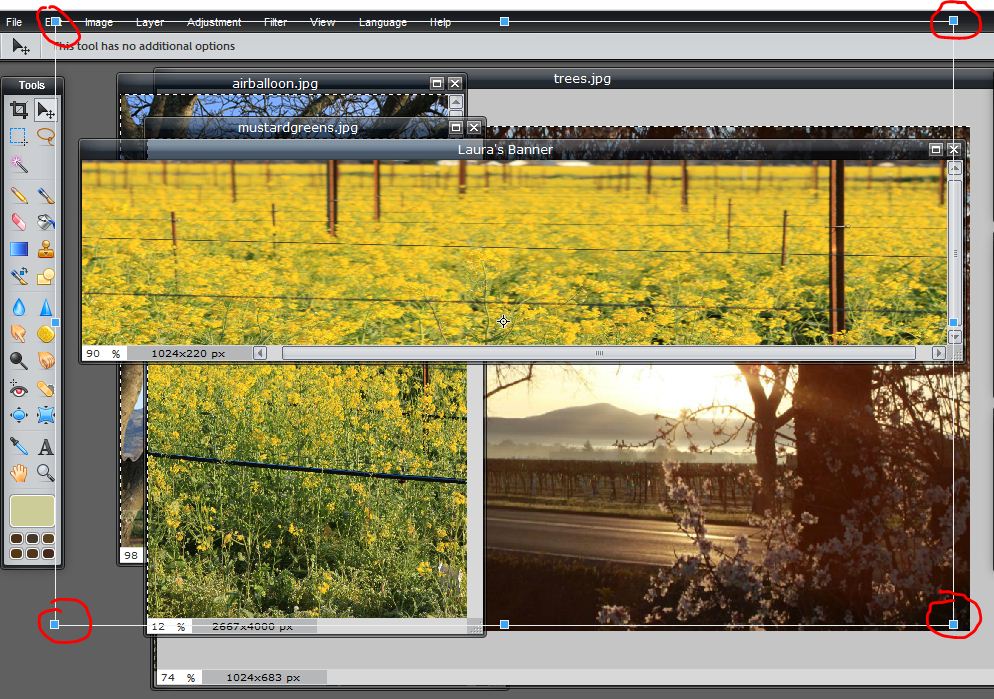
Download mustardgreens.jpg and save it to your computer. Open the image in Pixlr. Press CTRL + A to select all of "mustardgreens.jpg", then press CTRL + C to copy. Then go to "Laura's Banner" and press CTRL + V to paste. Your banner should look like the image below so far. The reason that it is all blue is because our mustardgreens.jpg image is so huge that we need to scale it down.
Download mustardgreens.jpg and save it to your computer. Open the image in Pixlr. Press CTRL + A to select all of "mustardgreens.jpg", then press CTRL + C to copy. Then go to "Laura's Banner" and press CTRL + V to paste. Your banner should look like the image below so far. The reason that it is all blue is because our mustardgreens.jpg image is so huge that we need to scale it down.
To scale down our image make sure you are on the correct layer and go to Edit, then Free Transform (or you can just press CTRL + T). Scale your image down by clicking on the corners of the picture. This took me a couple of minutes to get it to look just right. Notice the corners of the image below that I circled in red. This shows you the outline of the entire image. Whatever is outside of the banner will not show up in the final product. When you have it scaled down to how you would like, then press Enter on your keyboard.
Step 7
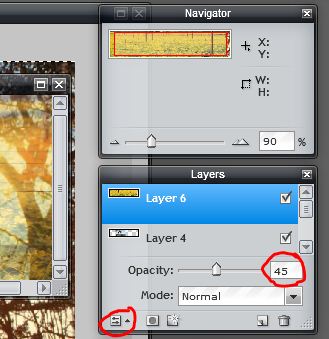
You may notice that the mustardgreens.jpg image is a little blurry, but that's okay. Reduce the opacity to 45% so you can see thru the mustardgreens.jpg. To do this, then make sure you are on the mustardgreens.jpg later. Now click on "Toggle layer settings" in the bottom left-hand corner of the layers box. Reduce the opacity to 45%.
You may notice that the mustardgreens.jpg image is a little blurry, but that's okay. Reduce the opacity to 45% so you can see thru the mustardgreens.jpg. To do this, then make sure you are on the mustardgreens.jpg later. Now click on "Toggle layer settings" in the bottom left-hand corner of the layers box. Reduce the opacity to 45%.
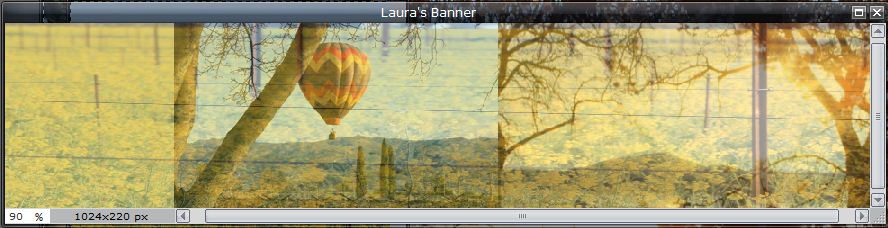
This is what your banner should look like now.
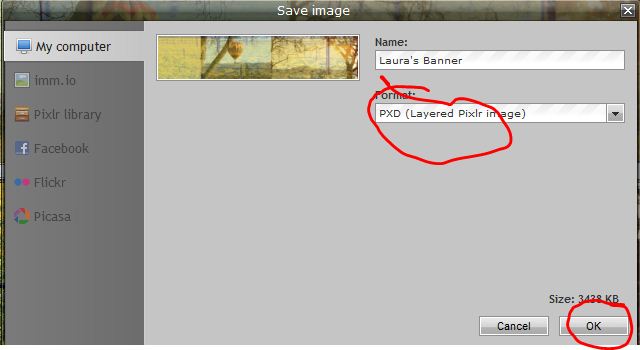
Save to your computer or to your Pixlr Library as a PXD (Layered Pixlr Image).
Step 8
Use a script font to display the elegance of Napa Valley. Type Discover Napa.
Use a script font to display the elegance of Napa Valley. Type Discover Napa.
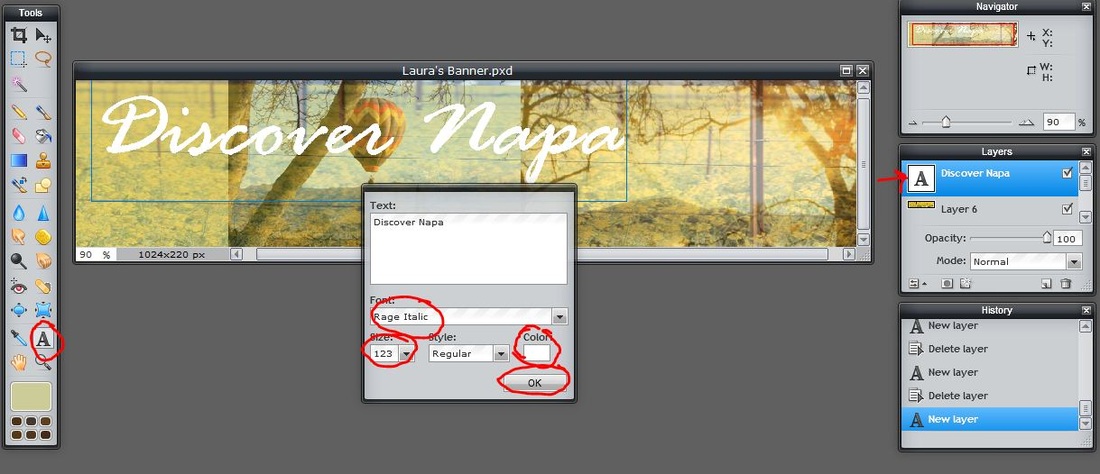
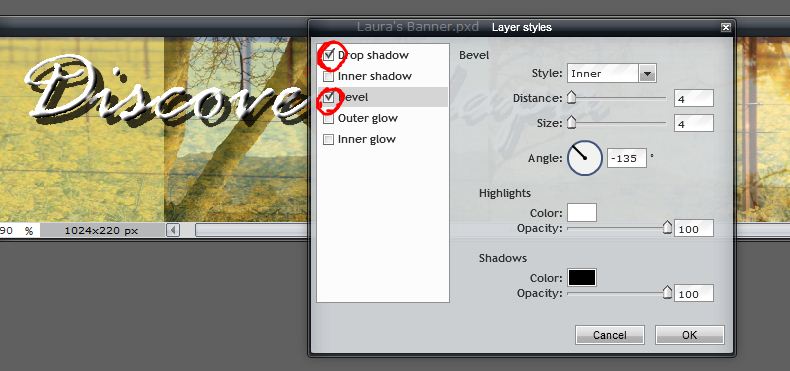
Embellish "Discover Napa" with layer styles. Go to Layer, then Layer Styles. (try a drop shadow and bevel).
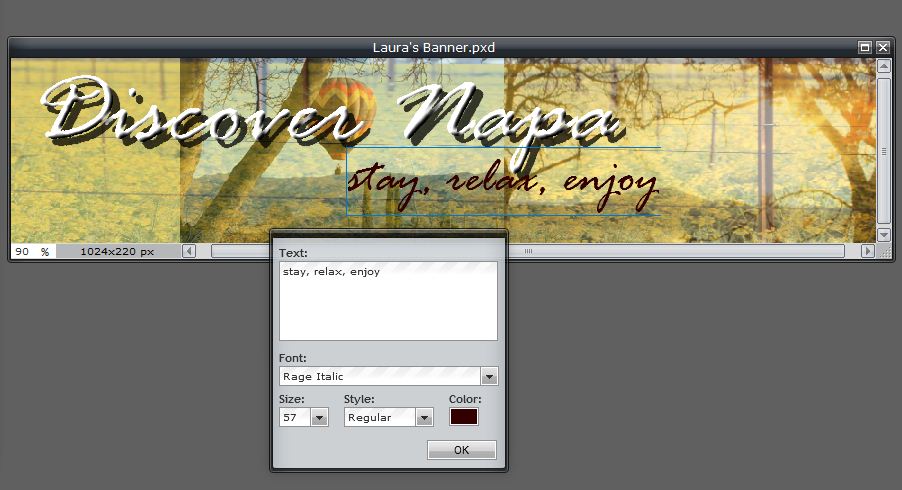
Select a different color. I chose to use #33000 from the tree trunk. Using the same font, Rage Italic, reduce the size to 57pt, type stay, relax, enjoy, placing it off to the right under Discover Napa.
Step 9
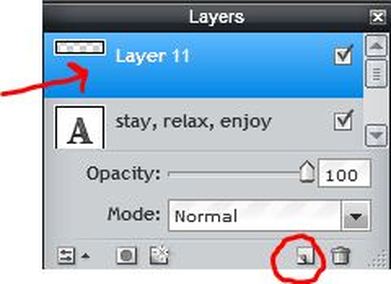
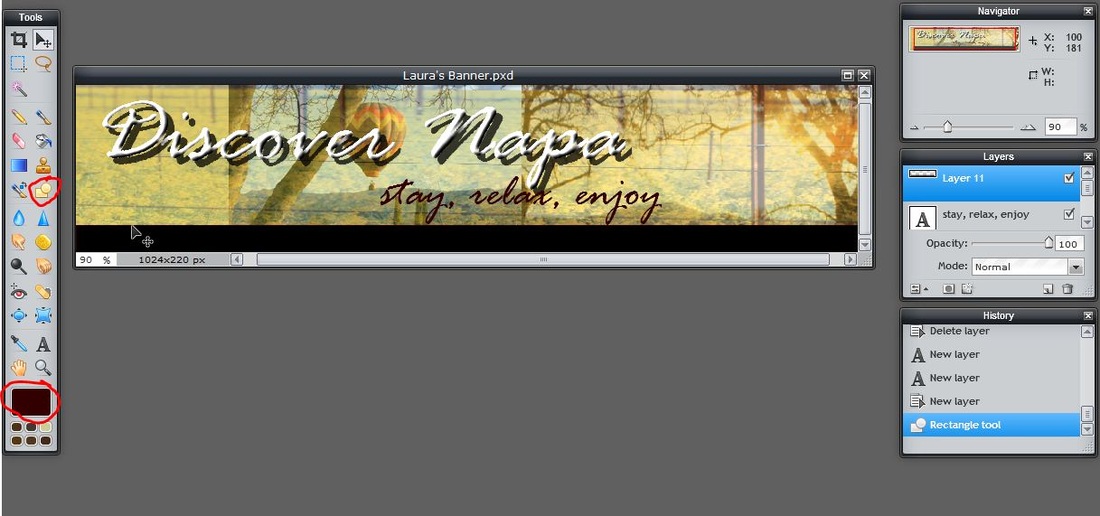
We are going to create a navigation bar now. First, we need to create a new layer.
We are going to create a navigation bar now. First, we need to create a new layer.
Using the rectangle tool, create a bar on the bottom of the banner that will hold the names of the links for the website. I choose the same color #330000 from the tree trunk.
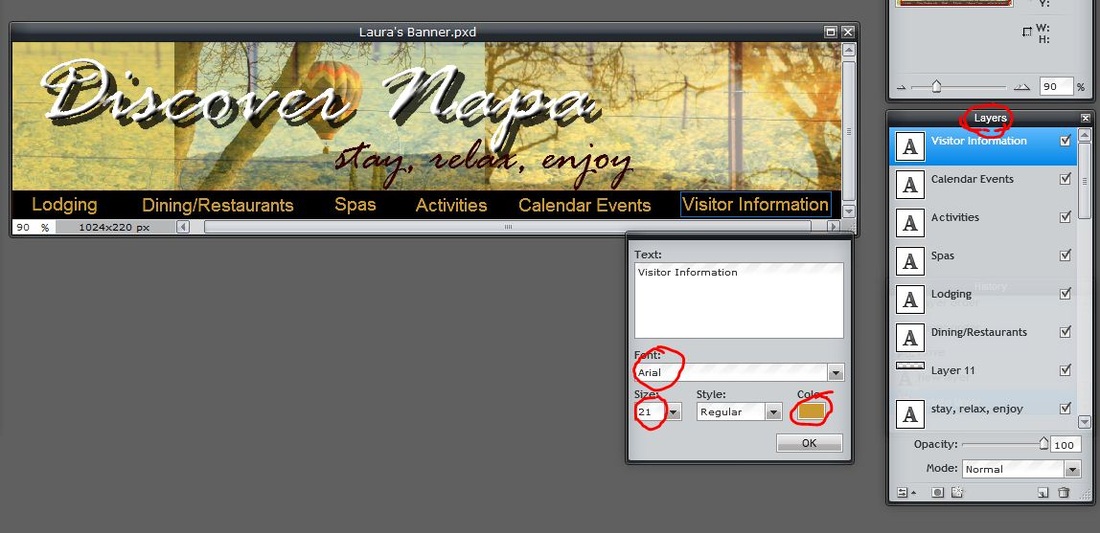
It is important that the text on the website is readable. For the links use Arial, 21 pt font and #cc9933, a gold color selected using the color picker from the gold in the mustardgreens.jpg image. On the rectangle bar type the links:
Equally space the links horizontally across the bar.
- Lodging
- Dining/Restaurants
- Spas
- Activities
- Calendar
- Events
- Visitor Information
Equally space the links horizontally across the bar.
Line is always a good feature to use.( I chose the golden color #cc9933 from the text.) Using the rectangle tool draw a thin line above the dark brown nav bar, about 10px wide, just to add an accent to the nav bar.
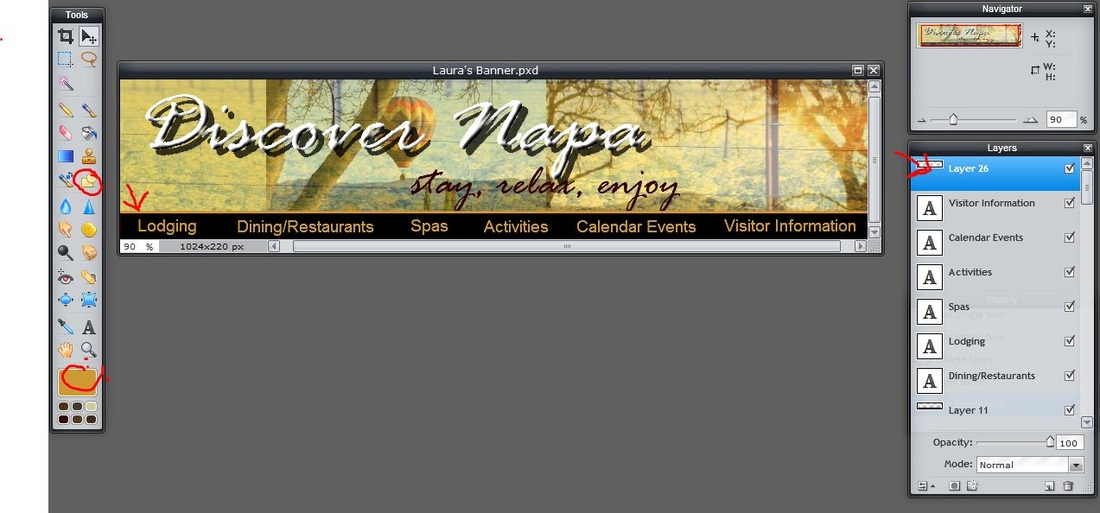
Save.
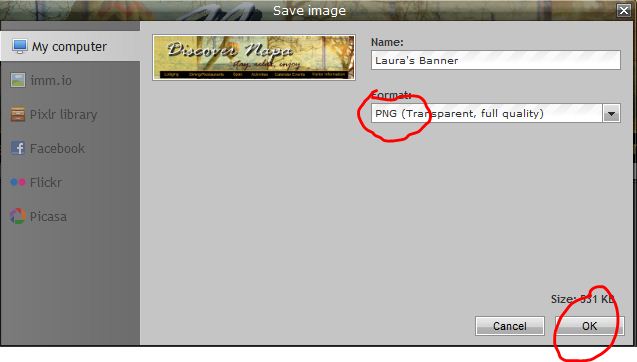
Step 10
Save your image as a PNG image to your computer.
Step 10
Save your image as a PNG image to your computer.
Using the sample above, create a web banner for a fictitious website. Use google images to search for images for your banner.
Additional Resources:
Additional Resources:
